Make your own static blog using Pelican
In the world of website creation, simplicity and efficiency are key. Enter Pelican, a powerful static site generator written in Python that's perfect for crafting blogs, portfolios, and straightforward websites. In this blog post, I'll guide you through the process of creating your own static blog site using Pelican and demonstrate how you can host it on GitHub Pages, all within a matter of minutes. Whether you're a novice or a seasoned developer, this guide will help you establish a minimal setup. And if you're itching to take your blog further, don't worry - Pelican makes customization astonishingly easy.
Now, let's dive into the world of Pelican and start building your static blog from scratch.

Step 1
Create a directory named blog and then create another Pelican directory inside it.
blog/
├── Pelican
cd into the Pelican directory and start by creating a Python virtual environment using the tool of your choice and installing the pelican package from pip.
$ python -m venv venv
$ source venv/bin/activate
(venv) $ python -m pip install pelican
The default content source format supported by Pelican is .rst (reStructured text). If you plan on using Markdown then you need to install the following package too.
python -m pip install "pelican[markdown]"
Step 2
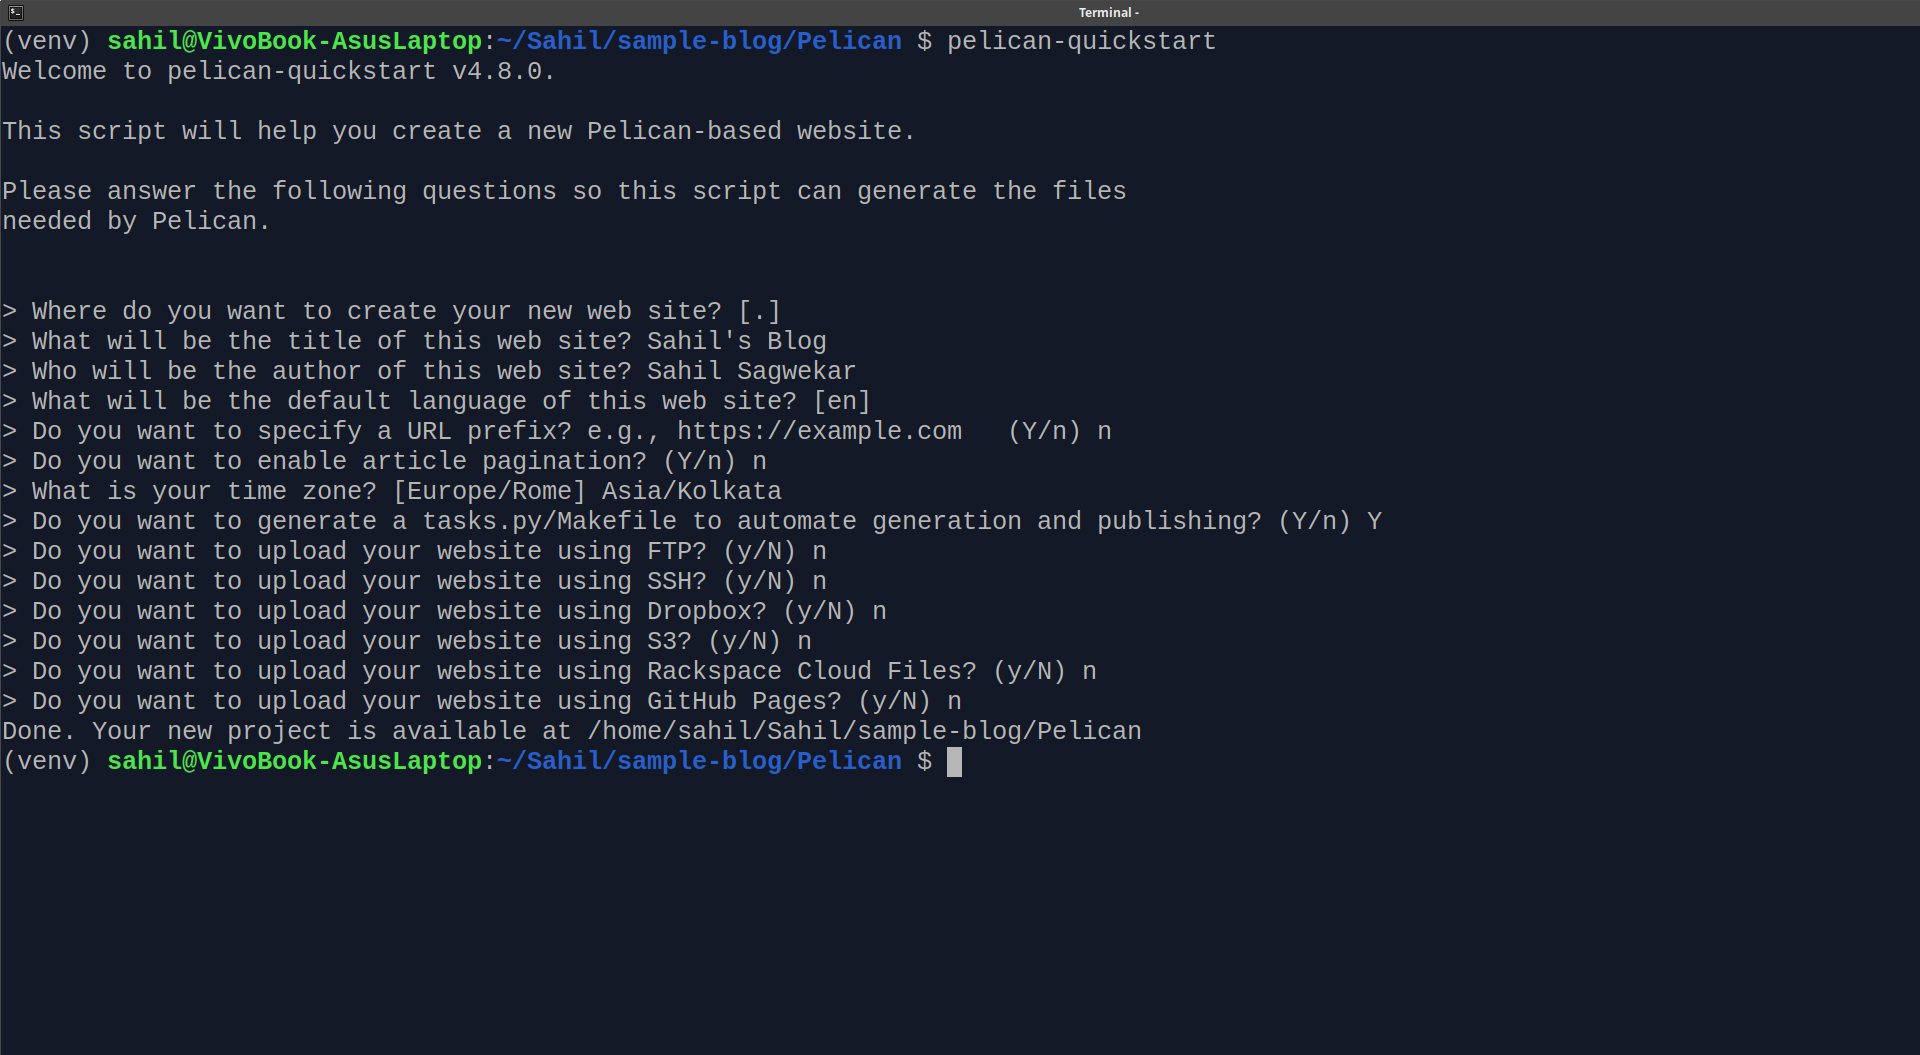
Pelican has a pelican-quickstart script which will help us to setup the basic settings interactively. It will also generate the desired directory structure for us. So let's start by using it. Here is an example -
Great! Now you have your pelican blog set up locally. Your file structure should now look like this -
blog/
├── Pelican
    ├── content
    │   └── (pages)
    ├── output
    ├── tasks.py
    ├── Makefile
    ├── pelicanconf.py       # Main settings file
    └── publishconf.py       # Settings to use when ready to publish
Important
You need to add a 'Metadata' section at the start of every content file. The metadata format for markdown content is as below -
Title: My super title
Date: 2010-12-03 10:20
Modified: 2010-12-05 19:30
Category: Python
Tags: pelican, publishing
Slug: my-super-post
Authors: Alexis Metaireau, Conan Doyle
Summary: Short version for index and feeds

This is the content of my super blog post.
You can now start writing up some amazing articles inside the blog/Pelican/content directory.
Step 3 - Importing an existing blog (optional)
You can skip this step if you don't wish to import your data from blogging platforms like Medium, WordPress, Tumblr etc.
Detailed documentation for this step can be found at https://docs.getpelican.com/en/latest/importer.html
Here we'll look at how to import your pre-existing medium.com blog as I feel it's one of the most used platforms
-
We will use the
pelican-importtool to import our data from medium.pelican-importrequires some additional dependencies which can be installed through the following steps.- feedparser
pip install feedparser- Pandoc See the Pandoc site for operating-system-specific installation.
-
Medium supports RSS feeds. Refer to this article for supported RSS feeds.
For importing blogs from a profile, use the following command.
pelican-import --feed https://medium.com/feed/@username -m markdownI have used markdown as the format in the above example, the default is reStructured Text.
The content will now be imported into the
blog/Pelican/contentdirectory.
Step 4
The default site generated by Pelican is plain HTML. Who likes to read plain HTML? No one. So let's spruce up our blog with a UI theme. (If you generate your content using Step 3, you might have a theme installed by default.)
Pelican has a large collection of community-maintained themes to choose from. To use these themes, we need to clone the themes repository locally.
Before we do that, make sure to create a git repository in the blog directory. Create a .gitignore file and add the following lines to it.
Pelican/pelican-themesPelican/venv
Now let's clone the pelican-themes repo. Run the following command inside the blog/Pelican directory.
git clone --recursive https://github.com/getpelican/pelican-themes ./pelican-themes
We will use pelican-themes command to install a new theme. Here, I'm installing the Pelican blue theme.
pelican-themes -i ./pelican-themes/pelican-blue
Now, we need to add this theme to our pelicanconf.py settings file. Note that every theme might have different settings which should be mentioned in the respective theme's GitHub repo. Copy the settings mentioned in the Pelican blue repo README. The theme should look like this - https://sahil-sagwekar.github.io

To test the blog locally, use the make devserver command. It will host your site at localhost:8000 by default and automatically regenerate on changes.
NOTE - Blank lines in the original blog post might result in some artifacts in the markdown content, make sure to check the files before publishing.
Step 5
Let's publish the site using GitHub pages so that anyone in the world can read your blog.
-
Open the
publishconf.pyfile and make sure that theSITEURLvariable has the valuehttps://your_username.github.ioand substitute your GitHub username in it. -
Now let's generate the site using the following command. This command should generate the site outside the
Pelicandirectory and inside theblogparent directory. Run this command in thePelicandirectory. -
pelican content -o .. -s publishconf.py
-
Make a GitHub repo with the name
your_username.github.io
and connect it to the local repository by
git remote add. -
Now push everything inside the
blogdirectory to the remote repo on GitHub. -
Enable GitHub pages for your repo from this site
https://github.com/your_username/your_username.github.io/settings/pages -
Now you should have your very own blog hosted at
https://your_username.github.io!
But this is just the beginning. Pelican offers a plethora of additional features and customization options. Whether you want to add new functionalities, experiment with different themes, or delve into the world of web dev, you have a robust platform to build upon.
Happy Blogging!